DIY Home Security: 10 Affordable Ways to Protect Your Property

Protecting your home is a top priority, but it doesn’t have to come with a hefty price tag. There are numerous affordable ways to enhance your home security and deter potential intruders. Here are ten cost-effective DIY methods to safeguard your property and provide peace of mind.

1. Reinforce Doors and Windows

The first line of defense for your home is your doors and windows. Ensure all entry points are sturdy and secure. Install deadbolts on exterior doors and reinforce door frames with strike plates. Use window locks and consider adding security film to make the glass more resistant to breaking. These simple measures can significantly increase your home’s security.

2. Install Motion Sensor Lights

Outdoor lighting is an excellent deterrent for burglars. Motion sensor lights can startle intruders and draw attention to your property. Place these lights near entry points, such as doors and windows, and in dark areas around your home. Solar-powered options are available, which can save on electricity costs and provide continuous security.

3. Use Smart Locks

Smart locks offer convenience and enhanced security. These locks can be controlled remotely via your smartphone, allowing you to lock and unlock doors without needing a physical key. Some smart locks also come with features like temporary access codes for guests, alert notifications, and integration with other smart home devices.

4. Set Up a DIY Alarm System

A DIY alarm system can be a cost-effective alternative to professional monitoring services. Many DIY systems come with easy-to-install sensors for doors and windows, motion detectors, and a central control panel. These systems can send alerts to your smartphone, allowing you to monitor your home from anywhere. Some even offer optional professional monitoring for an added layer of security.

5. Secure Your Wi-Fi Network

Your home Wi-Fi network can be a gateway for cybercriminals to access your personal information and smart home devices. Secure your network by using a strong, unique password and enabling WPA3 encryption. Additionally, consider setting up a guest network for visitors and regularly updating your router’s firmware to protect against vulnerabilities.

6. Use Surveillance Cameras

Surveillance cameras are an effective way to monitor your property and deter potential intruders. Many affordable options are available, including wireless cameras that can be installed indoors and outdoors. Look for cameras with motion detection, night vision, and remote viewing capabilities. Place them at entry points and other vulnerable areas around your home.

7. Display Security Signs and Stickers

Sometimes, the mere presence of security signs and stickers can deter burglars. Even if you don’t have a full security system, placing signs and stickers from well-known security companies around your property can create the illusion that your home is protected. This simple and inexpensive tactic can make intruders think twice before targeting your home.

8. Trim Landscaping

Overgrown bushes and trees can provide cover for burglars attempting to break into your home. Regularly trim your landscaping to eliminate potential hiding spots and improve visibility around your property. Keep shrubs and hedges below window height and consider planting thorny bushes under windows to deter intruders.

9. Install a Peephole or Doorbell Camera

Knowing who is at your door before opening it can enhance your security. Install a peephole on your front door or opt for a doorbell camera that allows you to see and communicate with visitors remotely. Many doorbell cameras come with motion detection and video recording features, adding an extra layer of security to your home.

10. Join or Start a Neighborhood Watch Program

Community involvement can be a powerful tool in preventing crime. Join an existing neighborhood watch program or start one in your area. Working together with your neighbors to monitor suspicious activity and share information can create a safer environment for everyone. Regular meetings and communication can help build a strong network of vigilant community members.

Implementing these ten affordable DIY home security measures can significantly enhance the safety of your property without breaking the bank. By reinforcing doors and windows, installing motion sensor lights, using smart locks, setting up a DIY alarm system, securing your Wi-Fi network, using surveillance cameras, displaying security signs, trimming landscaping, installing a peephole or doorbell camera, and participating in a neighborhood watch program, you can create a robust security system that deters intruders and provides peace of mind. Prioritize these steps to protect your home and ensure the safety of your loved ones.

Bathroom Brilliance: 15 Stunning Makeover Ideas Under $500

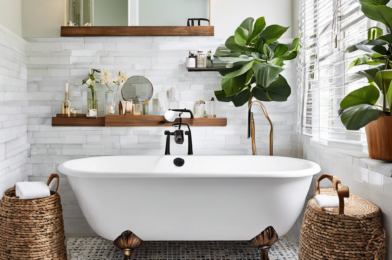
The world of bathroom design is thrilling, with a plethora of options to create a stunning and functional space. While many dream of a complete bathroom overhaul, budget constraints often bring us back down to earth. However, fear not! With a few simple tricks and clever ideas, you can achieve a beautiful bathroom makeover without breaking the bank.

So, roll up your sleeves and get ready to dive into some creative and affordable bathroom transformations that will leave your guests wondering if you spent a fortune. It’s all about maximizing impact while minimizing costs. Whether you’re looking for a quick refresh or a complete transformation, these 15 brilliant ideas will inspire and guide you towards a gorgeous new bathroom.

First, let’s talk about paint. A fresh coat of paint can instantly transform a dull bathroom. Go bold with a vibrant color or create a soothing atmosphere with muted tones. Don’t be afraid to experiment, as paint is a budget-friendly way to make a statement. Next, consider updating your hardware. Swapping out old fixtures and fittings for trendy new ones can completely change the look and feel of your bathroom. Opt for sleek, modern designs or quirky, vintage styles to add character.

Lighting is another essential element. Brighten up your space with new light fixtures that provide both function and style. Don’t forget the power of decor! Accentuate your bathroom with stylish yet affordable decor items like artwork, plants, and chic storage solutions. These additions can bring life and personality to the room.

If your bathroom needs a new vanity, there are cost-effective options available. Look for ready-to-assemble vanities or repurpose a vintage dresser into a unique and charming vanity. Playing with patterns is another fantastic way to add interest to your bathroom. Try a bold wallpaper accent wall or play with tile patterns to create a unique feature.

Mirrors are a must-have in any bathroom, and they also present an opportunity for creativity. Experiment with different shapes, frames, and sizes to find a mirror that becomes a focal point. Finally, don’t neglect the small details. Updating doorknobs, cabinet pulls, and even towel bars can make a noticeable difference in the overall aesthetic.

With these ideas in mind, you’re well on your way to a stunning bathroom transformation that won’t cost a fortune. Remember, with a bit of creativity, research, and elbow grease, your dream bathroom is achievable and within reach! So, get inspired, set your budget, and embrace the exciting journey of giving your bathroom a brilliant and affordable makeover.

Step-by-Step Guide: How to Build the Perfect Raised Garden Bed

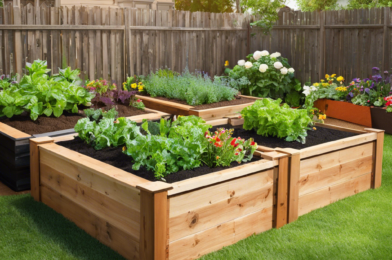
Creating a raised garden bed is a rewarding project for any gardener, novice or experienced. It’s a straightforward process that offers several benefits: improved soil drainage, easier access for planting and tending, and better soil quality, as you can customize the soil mixture to your plants’ needs. Here’s a step-by-step guide to building the perfect raised garden bed and enjoying the fruits (and vegetables!) of your labor.

First, choose an ideal location for your raised bed. Select an area that receives full sun exposure, generally at least 6 hours of direct sunlight daily. Ensure the site is level and has good drainage; you can improve drainage by adding a layer of gravel at the bottom of your raised bed. Define the size and shape of your garden bed. Standard dimensions are typically 4 feet wide, as this allows for easy access to the center of the bed from either side. The length can vary depending on your available space, and the shape can be rectangular, square, or even circular if you’re feeling creative.

Build the frame of your raised bed using sturdy materials such as cedar or redwood lumber, which are naturally rot-resistant. You can also use recycled plastic lumber or landscape timbers. Ensure the corners are securely fastened with brackets or screws. Line the bottom of your raised bed with landscaping fabric. This will prevent weeds from growing into your garden bed while allowing water to drain and roots to grow through. It’s an optional step, but it can save you time weeding in the future.

Now, it’s time to fill your raised garden bed with soil. A mixture of topsoil, compost, and mulch is generally recommended. The ratio can vary, but a good starting point is mixing two parts topsoil with one part compost and one part mulch. This will provide your plants with rich, nutrient-dense soil that drains well and retains moisture. Leave a couple of inches of space at the top of your raised bed when filling it to allow for soil settling.

Once your garden bed is filled, you can start planting! Choose plants that are suited to your climate and the amount of sunlight your garden receives. You can also extend your growing season by starting seeds indoors a few weeks before the last spring frost or by planting successive crops for fall harvest. Raised garden beds also provide an opportunity to practice companion planting, which is the practice of planting certain types of plants together to benefit each other, such as pest control or improved growth.

Water your newly planted garden regularly, especially during the first few weeks, to establish healthy roots. Maintain the moisture level of the soil by adding a layer of mulch, which will also suppress weeds. Finally, enjoy the fruits of your labor! Tending to your raised garden bed will provide you with fresh produce, beautiful flowers, or maybe even both, depending on what you chose to plant. Enjoy the convenience and comfort of having a well-organized, easily accessible garden that you built yourself.

Budget Kitchen Makeover: 20 High-Impact, Low-Cost Upgrades

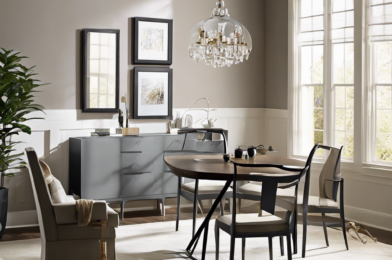
Kitchens are the heart of the home, but they can also be expensive to renovate. If you’re looking to give your kitchen a fresh new look without breaking the bank, there are plenty of high-impact, low-cost upgrades you can make. These simple changes can instantly update the space, making it more functional, aesthetically pleasing, and reflective of your personal style.

One of the easiest ways to transform your kitchen is to give it a fresh coat of paint. Opt for a neutral color palette to create a calm and inviting space, or choose a bold accent color to add a pop of personality. Painting your cabinets can also make a significant impact for a low cost. This simple update can instantly modernize the space, and if you’re feeling creative, consider adding a unique touch with two-tone cabinets or a colorful statement island.

Another budget-friendly upgrade is to change out your hardware. Updating cabinet knobs, pulls, and faucets can give your kitchen a whole new look and feel. Opt for brass, copper, or black matte finishes for a stylish and modern twist. You can also install new lighting to brighten up the space and create a warm and welcoming atmosphere. Try adding pendant lights above an island or under-cabinet lighting to illuminate your countertop and create a cozy ambiance.

Simple improvements such as adding a backsplash or changing your countertop can also make a big difference. Consider using peel-and-stick tiles or a simple subway tile for a classic and affordable backsplash option. For countertops, explore budget-friendly materials like laminate or wood, or look into having a custom concrete countertop made for a unique, industrial feel.

In addition to aesthetic changes, small organizational updates can also make your kitchen more functional. Invest in some clever storage solutions such as pull-out pantry shelves, cabinet organizers, or hanging pot racks to maximize your space and keep your kitchen tidy and efficient.

Don’t forget to add some personal touches to make the space feel like your own. Display artwork or family photos on walls or shelves, or add some greenery with potted herbs or hanging plants. These small additions bring life and character to your kitchen.

Finally, if your budget allows, consider purchasing one or two statement appliances, such as a colorful retro refrigerator or a sleek new stove, to become the focal point of your kitchen and really elevate the space.

With these simple and low-cost upgrades, you can create a beautiful and functional kitchen that suits your style and needs. So, take the plunge, get creative, and enjoy the process of transforming the heart of your home. The end result will be a space you love, without breaking the bank.

Ultimate Home Maintenance Checklist: Seasonal Tips for a Top-Shape House

As a homeowner, you know that maintaining your house is essential to preserving its value and ensuring your comfort. But where do you even start? This ultimate home maintenance checklist will help you stay on top of things, season after season.

Spring is the perfect time to give your home a fresh start. Begin by inspecting your roof for any winter damage and cleaning the gutters. Check for cracks in your home’s foundation and seal them to prevent water damage. It’s also a good idea to test and replace the batteries in your smoke and carbon monoxide detectors. Don’t forget to give your house a thorough deep cleaning, including those often-neglected areas like ceiling fans and inside kitchen cabinets.

As the temperature rises in summer, your focus should turn to the outside of your home. Power wash your siding and deck to remove built-up grime, and consider giving your fence a fresh coat of paint or stain. Summer is also the ideal time to inspect and repair your air conditioning unit to ensure it keeps you cool during those hot months. It’s important to keep your garden happy and healthy by weeding regularly and trimming back any overgrown trees or shrubs.

When autumn rolls around, it’s time to start preparing your home for the cooler months ahead. Clean and store your summer garden furniture and outdoor tools, and bring out your cozy indoor items, like area rugs and throw blankets. Service your furnace to ensure it’s in good working order, and clean your dryer vent to prevent fires.

Winter is the season to embrace coziness and ensure your home is safe and sound. Test your ground fault circuit interrupter outlets to ensure they’re working correctly, and check your attic insulation to see if it needs replacing. It’s also a good idea to inspect your fireplace and chimney for any damage and have them cleaned if necessary.

Performing regular maintenance on your home will ensure that it remains in top shape throughout the year. By breaking down your tasks into seasonal checklists, you can make these responsibilities more manageable and enjoyable. Happy homeowners understand that consistent upkeep is the key to preserving their property’s value and their peace of mind. Now, roll up those sleeves, and get started on that spring cleaning!

Pro Painting Secrets: Achieve Flawless Walls Like an Expert

Preparing to paint can be a daunting task, but with the right tools and techniques, you can achieve flawless walls that look like they were painted by professionals. In this article, we will reveal some trade secrets to help you master the art of wall painting and transform your space like magic.

First and foremost, proper preparation is key to success. Ensure you have all the necessary tools, including paint rollers, brushes, roller trays, drop cloths, painter’s tape, sandpaper, and primer. Clean the walls to be painted by removing any dirt, dust, or grime, and fill in any holes or cracks with spackling compound. Sand the walls lightly to create a smooth surface for the paint to adhere to. This step is crucial, as it ensures a seamless and professional finish. Take the time to do it thoroughly for the best results.

Choosing the right paint is another critical factor. Opt for a high-quality paint that offers good coverage and a smooth finish. Consider the sheen as well – a flat or eggshell finish is versatile and forgiving, while semi-gloss or high-gloss finishes can be more challenging to work with as they highlight imperfections. However, they are excellent choices for trim and woodwork as they are more durable and easier to clean.

Primer is another essential component, especially when painting over a darker color or stained walls. It helps to seal the surface and create a uniform base for the paint to adhere to, ensuring better coverage and a more consistent finish. Take the time to select the right primer for your specific wall conditions and paint color.

When it comes to painting technique, start at the top and work your way down. Cut in the edges around the ceiling, windows, and trim first, using a steady hand and a angled brush. Then, use a roller to paint the main wall areas, rolling in different directions to ensure even coverage. Take your time and use long, smooth strokes for the best results.

Another secret to achieving flawless walls is to thin your paint slightly. This may seem counterintuitive, but it helps the paint flow better and results in a smoother finish. Simply add a small amount of water to your paint, stirring thoroughly, until you achieve a creamy consistency. Always test your paint consistency on a small, inconspicuous area first to ensure you are happy with the coverage and finish.

Follow these tips, and you’ll be well on your way to achieving walls that look like they were painted by professionals. Remember, taking the time to prepare and using the right tools and techniques will yield stunning results that you can proudly showcase in your home. Happy painting!

15 Weekend DIY Projects to Transform Your Living Space

Transforming your living space doesn’t always require a major renovation or a hefty budget. With some creativity, effort, and a few weekends, you can significantly enhance your home’s aesthetics and functionality through DIY projects. These projects not only allow you to personalize your space but also provide a sense of accomplishment and can even increase your home’s value. From simple decor updates to more involved improvements, there’s a DIY project for every skill level and style preference. In this guide, we’ll explore 15 weekend DIY projects that can breathe new life into your living space, making it more beautiful, comfortable, and reflective of your personal taste.

1. Create an Accent Wall: One of the quickest ways to transform a room is by creating an accent wall. This project can be completed in a weekend and dramatically changes the feel of a space. You have several options for creating an accent wall: paint it a bold color that complements the rest of the room, apply wallpaper for added texture and pattern, or install wooden planks for a rustic touch. If you’re feeling particularly creative, consider a geometric paint design or a faux brick effect. When choosing your accent wall, opt for the one that naturally draws the eye when you enter the room. This project not only adds visual interest but can also make a small room appear larger or a large room cozier, depending on the colors and patterns you choose.

2. Build Floating Shelves: Floating shelves are a stylish and functional addition to any room, providing extra storage space while serving as a decorative element. This project requires basic carpentry skills but can be completed in a weekend. Start by purchasing wood planks and brackets from your local hardware store. Sand and stain or paint the wood to match your decor. Then, securely attach the brackets to the wall, ensuring they’re level and properly anchored into studs. Finally, attach the wood planks to the brackets. Once installed, you can use these shelves to display books, plants, photographs, or decorative objects. Floating shelves are particularly useful in small spaces where floor space is at a premium, and they can be customized to fit any room’s style, from minimalist to eclectic.

3. Upgrade Cabinet Hardware: A simple yet effective way to refresh your kitchen or bathroom is by upgrading the cabinet hardware. This project requires minimal tools and can be completed in just a few hours. Start by removing the existing knobs or pulls and filling any holes if you’re changing the hardware configuration. Then, choose new hardware that complements your decor style – sleek and modern, vintage-inspired, or something in between. When installing the new hardware, use a template to ensure consistent placement. This small change can have a big impact, giving your cabinets a whole new look without the expense of replacing them entirely. It’s an excellent way to experiment with different styles and can even serve as a starting point for a larger room makeover.

4. Create a Gallery Wall: A gallery wall is a fantastic way to personalize your space and showcase your favorite art, photographs, or mementos. This project allows for endless creativity and can be tailored to fit any style or space. Start by collecting the pieces you want to display – this could include framed prints, photographs, mirrors, or even small sculptural elements. Lay out your arrangement on the floor first to experiment with different compositions. Use kraft paper to create templates of each piece, which you can then tape to the wall to visualize the final layout before making any holes. When you’re satisfied with the arrangement, hang your pieces using appropriate hardware. A gallery wall can transform a bland space into a focal point that tells your personal story and adds visual interest to any room.

5. Paint or Stain Furniture: Breathing new life into old furniture with paint or stain is a rewarding weekend project that can dramatically change the look of a room. Start by thoroughly cleaning the piece and sanding it to create a smooth surface for the new finish. If you’re painting, apply a primer before your chosen color. For a distressed look, sand the edges after painting to reveal some of the original wood. If you’re staining, apply the stain evenly and wipe off excess for a natural look. Finish with a clear protective coat. This project allows you to customize furniture to match your decor perfectly and can save you money compared to buying new pieces. It’s also an excellent way to preserve and update family heirlooms or flea market finds.

6. Install a Backsplash: Adding a backsplash to your kitchen or bathroom can protect your walls from water damage while also serving as a decorative focal point. While traditionally a more involved project, peel-and-stick tile options have made this a feasible weekend DIY. These tiles come in various styles and patterns, from classic subway tiles to intricate mosaics. Start by cleaning the wall surface thoroughly. Measure and cut the tiles as needed, then peel off the backing and stick them to the wall, ensuring they’re level and aligned. Use a grout pen to fill in the gaps for a finished look. If you’re comfortable with more traditional tiling methods, you can use ceramic or glass tiles with mortar and grout. A new backsplash can completely transform the look of your kitchen or bathroom, adding color, texture, and personality to the space.

7. Create a Vertical Garden: Bringing nature indoors not only beautifies your space but also improves air quality and can boost your mood. A vertical garden is an excellent solution for those with limited floor space. Start by choosing a sunny wall or corner. You can create a living wall using a purchased kit or build your own using wooden pallets, picture frames, or even gutters repurposed as planters. Secure your structure to the wall, ensuring it can support the weight of soil and plants. Line the structure with landscape fabric to contain soil and moisture. Choose plants that thrive indoors and have similar care requirements. Succulents, ferns, and trailing plants work well in vertical gardens. Water carefully to avoid oversaturation. This project not only adds a unique design element to your space but also connects you with nature, even in urban environments.

8. Build a Custom Headboard: A custom headboard can serve as a striking focal point in your bedroom and is a project that can be completed in a weekend. There are numerous approaches to this project, depending on your style preferences and skill level. For a simple option, you could upholster a large piece of plywood with foam and fabric, attaching it to the wall or bed frame. For a more rustic look, create a headboard using reclaimed wood planks, either left natural or painted. If you’re feeling ambitious, you could build a tufted headboard, which involves a bit more work but creates a luxurious, high-end look. Whatever style you choose, ensure the headboard is securely attached to prevent accidents. This project allows you to create a one-of-a-kind piece that perfectly complements your bedroom decor and can dramatically change the room’s ambiance.

9. Refresh Your Front Door: Your front door is the first thing visitors see, and refreshing it can significantly boost your home’s curb appeal. Start by cleaning the door thoroughly and removing any hardware. If the door is in good condition, a fresh coat of paint might be all that’s needed. Choose a color that complements your home’s exterior but don’t be afraid to go bold – a bright red or deep blue can make a statement. If the door is wooden and you prefer a natural look, you could strip the old finish and apply a new stain. Consider updating the hardware as well for a complete refresh. You might also add new house numbers or a stylish door knocker. This relatively simple project can have a big impact on your home’s overall appearance and create a welcoming entrance.

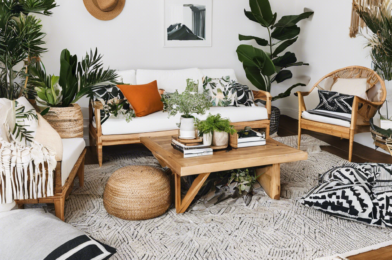
10. Create a Reading Nook: Transforming an unused corner into a cozy reading nook is a project that can be completed in a weekend and adds both functionality and charm to your living space. Start by choosing a comfortable chair or small loveseat that fits the space. Add soft lighting with a floor lamp or wall-mounted sconce. Install floating shelves above or beside the seating area to hold books and decorative items. A small side table can provide a spot for drinks or a reading lamp. Complete the nook with a plush rug, soft throw pillows, and a warm blanket. If space allows, you might even build a window seat with storage underneath. This project creates a dedicated space for relaxation and reading, adding value to your home and providing a personal retreat within your living area.

11. Build a Kitchen Island: A kitchen island can add valuable workspace and storage to your kitchen, and building one can be a rewarding weekend project. Start by determining the size and style that fits your kitchen. You can repurpose an old dresser or cabinet as the base, or build one from scratch using plywood and 2x4s. Add casters for mobility if desired. For the countertop, you have several options: butcher block for a warm, natural look; laminate for an affordable and durable surface; or if you’re feeling ambitious, you could even pour a concrete countertop. Add hooks on the sides for hanging utensils or towels, and consider incorporating open shelving or cabinet doors for storage. This project not only increases your kitchen’s functionality but also creates a focal point that can enhance the overall design of the space.

12. Create Custom Closet Organization: Maximizing closet space can dramatically improve your daily routine and the overall organization of your home. This weekend project involves assessing your current closet setup and designing a system that works for your specific needs. Start by removing everything from the closet and taking precise measurements. Consider installing adjustable shelving, hanging rods at different heights, drawer units, and specialized storage solutions like shoe racks or jewelry organizers. You can purchase a closet organization kit or build custom elements using materials from a hardware store. Don’t forget to utilize vertical space with over-the-door organizers or high shelves for less frequently used items. A well-organized closet not only makes your space more functional but can also make your room feel larger and more peaceful.

13. Install Crown Molding: Adding crown molding to a room instantly elevates its appearance, giving it a more polished and elegant look. While this project requires some precision, it’s achievable for DIY enthusiasts with basic carpentry skills. Start by measuring your room carefully and purchasing pre-primed molding. You’ll need a miter saw to make precise angle cuts, especially for corners. Use a stud finder to mark where you can nail the molding securely. Apply construction adhesive to the back of the molding for extra security before nailing it in place. Fill nail holes and caulk gaps for a seamless finish, then paint the molding to match your decor. This project can significantly enhance the visual appeal of any room, adding character and potentially increasing your home’s value.

14. Create a Feature Floor: Transform a room by creating a feature floor using paint or peel-and-stick tiles. For a painted floor, thoroughly clean and sand the existing floor, then apply a primer. Use painter’s tape to create geometric patterns or stencils for more intricate designs. Apply floor paint in your chosen colors, allowing each coat to dry completely. Finish with several coats of clear polyurethane for durability. Alternatively, peel-and-stick floor tiles offer a wide range of patterns and are relatively easy to install. Ensure the existing floor is clean and level before applying the tiles. This project can dramatically change the look of a room, especially in spaces like bathrooms, laundry rooms, or mudrooms where a bold floor can make a big impact.

15. Build a Fire Pit: Creating an outdoor fire pit can transform your backyard into a cozy gathering space. While this project might require a full weekend, the result is well worth the effort. Start by choosing a safe location away from structures and overhanging trees. Mark out the area and excavate to a depth of about 6 inches. Create a level base with gravel. Arrange fire-resistant bricks or stones in a circle, using construction adhesive between layers for stability. Consider adding a metal ring inside for extra protection. Surround the pit with comfortable seating, such as Adirondack chairs or bench seating. This project not only adds functionality to your outdoor space but also creates a focal point for entertaining and relaxation.

These 15 weekend DIY projects offer a range of options for transforming your living space, from simple decor updates to more involved improvements. Each project allows you to put your personal stamp on your home while potentially increasing its value and functionality. Remember to always prioritize safety, use appropriate tools and materials, and don’t hesitate to seek help for tasks beyond your skill level. With creativity, effort, and a little patience, you can significantly enhance your living space, making it more beautiful, comfortable, and reflective of your personal style. Happy DIYing!