Deprecated: str_replace(): Passing null to parameter #3 ($subject) of type array|string is deprecated in /home/dh_5fg865/homeimprovementoasis.com/wp-content/plugins/all-in-one-seo-pack/app/Common/Traits/Helpers/Strings.php on line 129
- Home Improvement Oasis | DIY Projects & Tips

Furniture Restoration Guide: Breathe New Life into Vintage Pieces

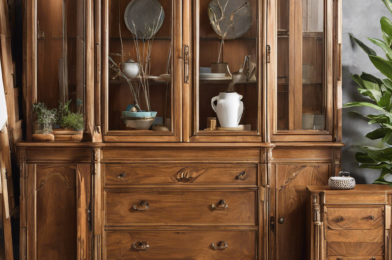
Furniture restoration is a rewarding craft that allows you to breathe new life into vintage pieces, preserving their character while making them functional for modern living. This practice not only saves money and reduces waste but also connects us to the craftsmanship of the past. Whether you’re a seasoned DIY enthusiast or a curious beginner, restoring furniture can be a fulfilling hobby that transforms neglected items into treasured possessions. This guide will walk you through the essential steps of furniture restoration, from assessing a piece’s potential to applying the final touches. By understanding the process and techniques involved, you’ll be well-equipped to tackle your own restoration projects and uncover the hidden beauty in old, worn furniture.

The first step in any restoration project is to carefully assess the piece of furniture you’re working with. Look for signs of structural damage, such as loose joints, cracks in the wood, or unstable legs. Check for any wood rot, especially in pieces that may have been exposed to moisture. Examine the finish to determine if it’s worth preserving or if it needs to be stripped and replaced. Take note of any missing hardware or decorative elements that might need to be sourced or reproduced. This initial assessment will help you plan your restoration approach and decide whether the piece is worth restoring. Remember, not every old piece of furniture is a hidden gem, but many have potential with the right care and attention. Consider the style and era of the piece as well, as this can inform your restoration choices and help maintain the furniture’s authenticity.

Once you’ve assessed the piece, the next step is to clean it thoroughly. Years of dirt, grime, and old polish can accumulate on furniture, obscuring its true condition and beauty. Start with a gentle cleaning using a mixture of warm water and mild soap, being careful not to saturate the wood. For tougher grime, you might need to use a specialized wood cleaner. Be cautious with any cleaning products and always test them on an inconspicuous area first. If the piece has any metal hardware, remove it if possible and clean it separately. For intricate carvings or hard-to-reach areas, use a soft-bristled brush or old toothbrush to gently scrub away dirt. After cleaning, make sure to dry the piece thoroughly to prevent any water damage. This cleaning process not only improves the appearance of the furniture but also prepares it for the next steps in restoration.

After cleaning, it’s time to address any structural issues. This might involve re-gluing loose joints, filling cracks or holes in the wood, or reinforcing weak areas. For loose joints, carefully disassemble the piece if possible, clean off old glue residue, and reapply wood glue before clamping the joint back together. Wood fillers can be used for small cracks and holes, while larger damages might require wood patches or even replacement pieces. If the furniture has any broken or missing parts, you may need to reproduce them. This could involve some woodworking skills or sourcing replica parts from specialty suppliers. For wobbly legs, check if the problem is with the leg itself or its attachment to the furniture. Tightening screws or reinforcing with corner braces can often solve these issues. Remember, the goal is to make the piece structurally sound while maintaining its original character as much as possible.

The next consideration is the finish of the furniture. Depending on the condition of the existing finish and your restoration goals, you might choose to preserve, refresh, or completely strip and refinish the piece. If the existing finish is in good condition but just looks dull, you might be able to revive it with a good cleaning and a coat of furniture wax or polish. For slightly more worn finishes, you could try using a restorative product designed to nourish and protect the wood. If the finish is beyond repair or if you want to dramatically change the look of the piece, you’ll need to strip the old finish entirely. This can be done using chemical strippers or sanding, depending on the type of finish and the wood underneath. Be aware that stripping can be a messy and time-consuming process, but it often yields the most transformative results. Always work in a well-ventilated area and use appropriate safety gear when working with chemical strippers.

Once you’ve addressed the structural issues and decided on your approach to the finish, it’s time to focus on the finer details that can really make a piece shine. This might include restoring or replacing hardware such as drawer pulls, hinges, or decorative elements. If the original hardware is in good condition, you might be able to clean and polish it to restore its luster. For missing or damaged hardware, you can often find suitable replacements at antique stores, specialty hardware suppliers, or even online marketplaces. When choosing replacement hardware, try to match the style and era of the piece for a cohesive look. This is also the stage where you might consider making subtle upgrades to improve functionality, such as adding drawer slides for smoother operation or installing a glass top to protect a delicate surface. These small touches can significantly enhance both the appearance and usability of the restored piece.

If you’ve decided to refinish the piece, the next step is applying the new finish. This process typically involves sanding the wood to create a smooth surface, applying a wood stain if desired, and then protecting the wood with a clear finish. When choosing a stain, consider the type of wood and the overall look you’re trying to achieve. Test the stain on an inconspicuous area or a scrap piece of similar wood to ensure you’re happy with the color. After staining, you’ll need to apply a protective finish such as polyurethane, lacquer, or varnish. These finishes not only enhance the appearance of the wood but also protect it from moisture and wear. Apply thin, even coats, allowing each to dry completely and lightly sanding between coats for the smoothest result. The number of coats will depend on the product you’re using and the level of protection you want to achieve. Remember, patience is key in this step – rushing the finishing process can lead to drips, bubbles, or an uneven appearance.

The final stage of furniture restoration involves adding those finishing touches that truly bring the piece back to life. This might include reupholstering cushions or seats if the piece has any fabric elements. When choosing new fabric, consider both the style of the furniture and how it will be used in your home. For wooden surfaces, a final coat of furniture wax can add depth to the finish and provide additional protection. Pay attention to small details like ensuring all hardware is properly aligned and tightened. If you’ve replaced any elements, make sure they blend seamlessly with the original parts of the furniture. This is also the time to step back and assess your work, touching up any areas that might need a little extra attention. Remember, the goal of restoration is not always to make the piece look brand new, but to preserve its character while making it beautiful and functional once again.

Furniture restoration is as much an art as it is a craft, requiring patience, skill, and an eye for detail. As you work on your projects, you’ll develop a deeper appreciation for the craftsmanship of the past and the unique character of vintage pieces. Each restoration project presents its own challenges and rewards, offering opportunities to learn new techniques and problem-solving skills. Whether you’re restoring a family heirloom or rescuing a flea market find, the process of bringing old furniture back to life can be incredibly satisfying. As you gain experience, you might find yourself looking at old, worn furniture with new eyes, seeing potential where others see only junk. Remember, successful restoration is about balancing respect for the piece’s history with the needs of modern living, creating furniture that’s not just beautiful, but also functional and cherished for years to come.

Color Psychology: Choose the Perfect Paint for Any Room

Color has an incredible impact on our mood and perception, and when it comes to painting our living spaces, choosing the right shade can make all the difference. The psychology of color suggests that different hues can influence our emotions and even our behavior, so it’s no surprise that we’re turning to color theory to guide our paint choices. From soothing blues to energetic yellows, each color sets a distinct tone and creates a unique atmosphere in our homes.

When selecting a color palette for your home, consider the function of each room and the mood you want to evoke. For example, a bedroom should be a calming and relaxing sanctuary, while a home office might benefit from energetic and stimulating shades. Blues are known for their calming properties and can help create a serene environment, perfect for unwinding after a long day. Soft blues are an ideal choice for bedrooms as they promote relaxation and a good night’s sleep.

Green is associated with balance and harmony and has a soothing effect on the eyes. It is a color that represents nature and can bring a sense of tranquility to any space. Consider a gentle sage green for a bathroom to create a spa-like retreat or a refreshing mint green for a kitchen to promote a sense of calm while cooking. Green is also believed to improve concentration, making it a suitable choice for a home office or study room.

While colors like red and orange are known for their bold and energetic qualities, they are best used as accents rather than the main color palette. A feature wall in a vibrant shade of red can add a dramatic touch to a living room, or a splash of orange in an entryway can create a welcoming and upbeat atmosphere. These warm hues stimulate conversation and are perfect for social areas of the home. When incorporated thoughtfully, they can bring a sense of excitement and passion to any space.

The power of color in our homes is undeniable, and with the right choices, we can create a harmonious and inviting environment. Whether you’re seeking a calming retreat or an inspiring workspace, color psychology offers valuable insight. Remember, the shades you choose will influence not only the aesthetic appeal of your home but also the mood and energy of those who inhabit it.

However, personal preference always takes precedence over color theory. What makes you happy and comfortable in your space is the most important consideration. After all, your home should be a reflection of your unique personality and style. So, embrace the power of color, but ultimately, trust your instincts when it comes to creating your dream home. With the right balance of color and design, you can achieve a space that nurtures and inspires you every day.

As you delve into the world of color psychology and the intriguing effects of different hues, remember to have fun with your choices and don’t be afraid to experiment. The journey of discovering the perfect palette for your home is an enjoyable part of the painting process, so take your time and explore the wonderful world of color. Happy painting, and may your walls be transformed into a glorious canvas that uplifts your spirit!

Boost Your Curb Appeal: 15 Budget-Friendly Exterior Improvements

Exterior renovations can be costly, but there are plenty of budget-friendly ways to enhance your home’s curb appeal. These simple improvements can make a significant impact without breaking the bank, and you might even have some fun in the process! Here are 15 great ideas to get you started:

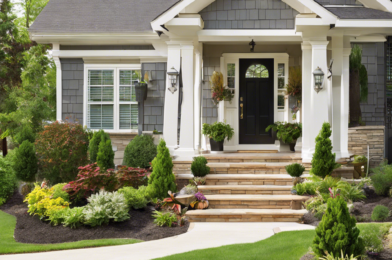
First impressions count, so start with your front door. A fresh coat of paint in a bold color can instantly transform your entryway and set the tone for the entire exterior. Choose a hue that complements your home’s style and reflects your personality. You could also consider updating the hardware, such as the knocker or handle, for a modern touch.

Windows are another key feature that can be enhanced with a few simple touches. Add flowering window boxes to bring life and color to the facade, or install stylish shutters for a sophisticated accent. If your windows are looking tired, a deep clean or a new coat of paint on the frames can work wonders.

The pathway leading to your home should be inviting and well-maintained. Remove any weeds or overgrown shrubs, and consider edging the pathway with bricks or stones for a neat finish. If your budget allows, add solar lights along the way to guide visitors and enhance the ambiance during evening gatherings.

A manicured lawn is key to a beautiful exterior. Ensure your grass is healthy and lush by fertilizing and mowing regularly. If your budget and time allow, consider landscaping with flowering plants, shrubs, and trees to add visual interest and curb appeal. You can also define garden beds with neat edges, and don’t forget to keep them weed-free!

Continue to enhance your outdoor space by paying attention to the details. Small touches, such as updating house numbers, installing stylish porch lighting, or adding a unique mailbox, can make your home stand out. These finishing touches showcase your attention to detail and create a cohesive look.

Consider giving your garage door a facelift, as it often takes up a significant portion of your home’s exterior. A fresh coat of paint or a new, more modern door can instantly improve the overall appearance. You could also add decorative hardware for a sophisticated touch.

Enhance the charm of your home by incorporating accents through thoughtful additions. Try placing a pair of planters or large urns on either side of the entryway to create a sense of symmetry and balance. This simple touch adds elegance and a sense of grandeur to your facade.

Don’t forget to show your porch or entryway some love! Power wash or repaint porch floors, railings, and stairs to make them look fresh and inviting. If you have the space, add comfortable furniture and colorful cushions to create a welcoming vignette that beckons guests to relax and stay awhile.

These improvements are achievable for any homeowner, and you can choose the projects that fit your budget and schedule. Enjoy enhancing your home’s exterior and boosting that curb appeal!

Remember, you can always adjust and personalize these suggestions to match your unique style and the character of your home. Happy renovating!

Storage Maximizer: Clever Organization Ideas for Every Room

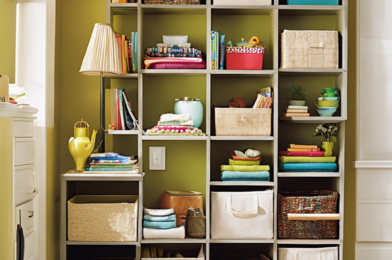
Struggling to tame the chaos in your home? Say goodbye to clutter and hello to a calm, organized space! Whether you’re dealing with a tiny bedroom or a spacious living room, these clever organization ideas will help you maximize every inch of storage potential.

First, let’s talk about the bedroom. Beyond the usual under-the-bed storage, consider investing in bed frames with built-in drawers or lift-top storage. It’s a great way to keep extra linens, bulkier clothing, or even shoes tucked away neatly. For a more creative touch, install a decorative curtain rod and use attractive drapes to conceal storage areas or divide spaces, providing both function and aesthetic appeal.

Now, moving into the living room, we often overlook the potential of our furniture. Opt for multi-functional pieces with hidden storage compartments, such as ottomans with removable lids or hollowed-out seats. Coffee tables with shelves or drawers can also serve as display areas for books and decorative items while keeping remotes and other essentials close at hand.

The bathroom is another area ripe for optimization. Make use of vertical space by installing floating shelves or tiered storage units to hold towels, toiletries, and other essentials. Utilize the space behind the bathroom door by hanging a multi-pocket organizer, perfect for storing hair tools, makeup, or other small items.

For the kitchen, think about utilizing the often-overlooked real estate on the insides of cabinet doors. Install hooks or small racks to hang measuring cups, spoons, and other utensils, keeping them easily accessible but neatly tucked away. Magnetic knife strips are another clever way to save drawer space and showcase your knife collection.

In the entryway or mudroom, consider adding built-in cubbies, complete with hooks, shelves, and perhaps a bench for seating. This creates a dedicated space for coats, bags, and shoes, keeping them off the floor and helping family members stay organized as they come and go.

Lastly, don’t forget about the garage or utility room, which often become dumping grounds for various items. Install sturdy wall-mounted shelving to store tools, garden supplies, and other bulky items. Clear plastic bins with labels are ideal for smaller items, ensuring you can find what you need at a glance.

By embracing creative storage solutions and a thoughtful approach to organization, you can transform your home into a functional and serene space, bringing a sense of calm to your daily life.

Essential DIY Plumbing Repairs Every Homeowner Should Master

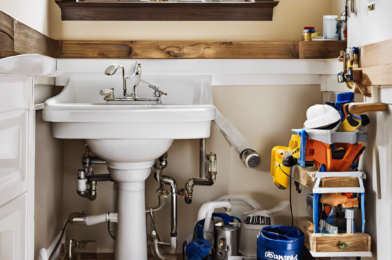
As a homeowner, it’s inevitable that you’ll encounter plumbing issues at some point. While some problems may require the expertise of a professional plumber, there are several basic repairs and maintenance tasks that you can master yourself. Not only will this save you money, but it will also give you the satisfaction of taking care of your home independently. So, roll up your sleeves and get familiar with these essential DIY plumbing repairs.

First and foremost, every homeowner should feel confident in tackling a clogged drain. This common issue can usually be resolved with a plunger or a drain snake. Learn how to use these tools effectively and safely, and you’ll be able to clear blockages in sinks, tubs, and toilets in no time. It’s a messy job, but someone has to do it! Additionally, knowing how to replace a toilet flange is an important skill. This part of your toilet’s plumbing connects the drain to the floor and can become damaged or worn over time. With the right know-how, you can replace it yourself and ensure a secure seal to prevent leaks.

Leaky faucets are not only annoying, but they can also waste a significant amount of water and drive up your utility bills. Fortunately, fixing a leaky faucet is usually a straightforward task. Identify the type of faucet you have, turn off the water supply, and disassemble the faucet to replace the faulty washer or O-ring. It’s a simple repair that will save you money and conserve water. Similarly, knowing how to replace a showerhead is a quick and easy way to improve your shower experience and reduce water waste.

Another essential skill is understanding how to detect and fix hidden leaks. Minor leaks can often go unnoticed, but they can cause significant damage to your home over time. Learn the signs of hidden leaks, such as damp spots on walls or floors, musty odors, or higher-than-usual water bills. Use a moisture meter to pinpoint the source of the leak and then repair or replace the damaged pipes or fittings.

Small Space Solutions: Create a Functional Home Office Anywhere

Working from home has become the new normal for many professionals, but creating a dedicated office space in a small living area can be challenging. However, with clever planning and innovative design solutions, it is possible to carve out a functional and inspiring home office, no matter how limited your square footage may be.

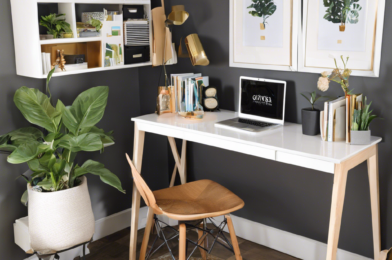
Firstly, define your workspace. If you have a spare room, great! But if not, get creative. Consider under-utilized areas like hallways, niches, or that awkward space under the stairs. With the right setup, these spots can become productive workplaces. Invest in customizable, multi-purpose furniture designed for small spaces. Look for fold-away, wall-mounted, or height-adjustable desks that can adapt to your needs and maximize your available space. Create zones within open-plan layouts to establish a distinct office area. Room dividers, bookcases, or strategically placed furniture can help separate your workspace from the rest of your home, providing a sense of structure and privacy.

Take advantage of vertical space by installing floating shelves or utilizing overhead storage. This frees up valuable floor space and keeps your work essentials organized and within easy reach. Embrace a minimalist aesthetic to make your home office feel more spacious. Opt for light, neutral colors on walls and furniture, and incorporate natural light as much as possible to create a bright and airy environment.

Good lighting is essential for any office. Position your desk near a window to benefit from natural light during the day. When evening falls, an adjustable desk lamp will provide focused task lighting without taking up too much space. Conceal necessary office equipment, like printers and scanners, within stylish cabinets or opt for compact, sleek designs that can be tucked away. This helps maintain a tidy, uncluttered look, which is crucial in small spaces.

Incorporate hidden storage solutions to keep your space organized and clutter-free. Utilize over-the-door organizers, install floating shelves, or invest in multi-purpose furniture with built-in storage. Add a personal touch to your home office with artwork, plants, or inspirational quotes. Surround yourself with things that spark joy and productivity, making even the smallest office a pleasant place to be.

Lastly, remember that functionality is key. Ensure your home office meets your unique needs, whether that means investing in ergonomic furniture, soundproofing the space, or incorporating smart technology solutions. By following these design tips and tailoring them to your specific requirements, you can create an efficient and enjoyable home office, regardless of the size constraints of your living space. With creativity and thoughtful planning, your small-space home office can become a productive haven that enhances your work-from-home experience.

Floating Shelves 101: A Beginner’s Guide to Stylish Storage

Floating shelves are a versatile and elegant storage solution that can enhance your space aesthetically and functionally. They are an increasingly popular choice for homeowners and renters alike, offering a sleek and modern alternative to traditional shelving. This beginner’s guide will walk you through everything you need to know about floating shelves, from their benefits and styling options to installation tips and design inspiration.

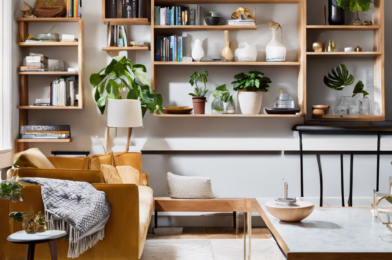
One of the biggest advantages of floating shelves is their ability to maximize space. Because they are attached directly to the wall, they don’t require the floor space that a bulky bookshelf or cabinet would. This makes them ideal for small spaces or areas where you want to maintain an open and airy feel, such as a living room or entryway. Floating shelves can also be easily customized to fit your unique style and storage needs. They come in a variety of materials, from classic wood to modern metal, and can be painted or stained to match any color palette.

When it comes to styling your floating shelves, the possibilities are endless. You can use them to display everything from books and photos to decorative plants and artwork. For a functional approach, floating shelves can be installed in the kitchen to hold spices and cooking utensils or in the bathroom to store towels and toiletries. In a living room or den, floating shelves can showcase your favorite books, figurines, or collectibles.

To achieve a stylish and cohesive look with your floating shelves, consider using a consistent color scheme or theme. For example, you might choose shelves made from natural wood to complement a rustic or bohemian aesthetic. Alternatively, black metal shelves can add an industrial touch to your space. When styling the shelves, odd numbers of items tend to create a more visually appealing arrangement, and varying the height and size of objects can add depth and interest.

Installing floating shelves is typically a straightforward process, but it’s important to plan ahead and gather the necessary tools and materials. Measure the space where you want the shelves to go and mark the wall accordingly. Most floating shelves require drilling into studs for secure installation, so locating these beforehand is crucial. Once installed, floating shelves can be a stunning and practical addition to your home, offering both decorative appeal and functional storage. Whether you’re aiming for a minimalist, Scandi-inspired look or a cozy, eclectic vibe, floating shelves provide endless opportunities for customization and creative expression through your styling choices. With proper planning and a bit of creativity, you can transform any room into a stylish and efficient space that showcases your unique personality.

Energy-Saving Home Improvements That Pay You Back

The cost of heating and cooling our homes continues to rise, and with many of us spending more time at home, the impact on our wallets can be significant. The good news is that there are energy-saving home improvements you can make that will not only reduce your carbon footprint but also put money back in your pocket over time.

One of the most effective ways to save energy and money is to improve your home’s insulation. Proper insulation can reduce heat loss in winter and keep your home cooler in summer, leading to lower heating and cooling costs. Focus on areas such as the attic, basement, and exterior walls, and consider using modern materials such as spray foam insulation for maximum efficiency.

Upgrading your windows is another great investment. Old, single-pane windows can be a major source of heat loss, and replacing them with energy-efficient double or triple-pane windows can make a big difference. Look for windows with low-E coatings, which help reflect heat back into your home in winter and keep it out in summer.

Another simple yet effective improvement is to seal any gaps or cracks in your home’s envelope. This can be done by caulking around windows and doors and adding weatherstripping to doors and attic hatches. These small improvements can have a significant impact on your energy bills, as they stop the heated or cooled air from escaping, ensuring your HVAC system doesn’t have to work overtime.

Investing in a smart thermostat is also a wise move. These devices allow you to control your home’s temperature remotely and can even learn your habits to automatically adjust the temperature when you’re away, ensuring energy isn’t wasted heating or cooling an empty home. Many utility companies also offer rebates for installing smart thermostats, so be sure to check for any available incentives.

While some of these improvements may require an upfront investment, the long-term savings can be significant. Not only will you reduce your environmental impact, but you’ll also enjoy lower energy bills and a more comfortable home all year round. With the right combination of improvements, your home can become a more efficient and cost-effective haven.

To help finance these improvements, there are often government incentives and rebates available. Do some research to find out what programs are offered in your area, as these can help offset the initial costs. For example, the US Department of Energy offers the Residential Renewable Energy Tax Credit, which gives you a tax credit for installing certain renewable energy systems such as solar panels or geothermal heat pumps.

Lastly, don’t forget to compare contractors and get multiple quotes before starting any major projects. By combining these energy-saving improvements with smart financing options and available rebates, you can make your dream of a more energy-efficient home a reality while also boosting your home’s value and comfort. These improvements truly pay you back in more ways than one.

Upcycling Magic: Transform Trash into Trendy Home Decor

Upcycling, the creative process of transforming discarded items into something new and useful, is taking the world by storm. It’s an innovative way to reduce waste, spark creativity, and add unique touches to your living space. With a bit of magic and imagination, that forgotten furniture or those unwanted objects can find new life as trendy home decor.

Upcycling has gained popularity as a sustainable and cost-effective alternative to traditional shopping. It empowers individuals to take control of their consumption habits and make environmentally conscious choices. By repurposing pre-loved items, upcyclers give them a second chance, reducing the demand for new products and minimizing the waste that ends up in landfills. It’s a win-win for both creativity and the environment!

There are endless possibilities when it comes to upcycling. That old dresser gathering dust in your attic can become a stunning new bedroom centerpiece with a fresh coat of paint and some new hardware. Those stack of vintage suitcases hidden in the back of your closet can be transformed into a unique end table with a bit of elbow grease. Even something as simple as a mason jar can be upcycled into a chic drinking glass or stylish bathroom storage solution.

One of the most appealing aspects of upcycling is the opportunity to create something truly unique that reflects your personal style. With upcycling, you’re not limited to the mass-produced options available in stores. You can customize every detail, from the color to the fabric, to match your vision and your space. And the best part? You’re giving new purpose to something that might otherwise have been discarded, reducing your environmental footprint one project at a time.

Upcycling also holds a special appeal for those who appreciate the history and character of pre-loved items. Each piece has a story to tell, and by incorporating them into your home, you become a part of that narrative. That worn-out chair you found at a garage sale might have a fresh new look, but it still retains the memories of its previous life, adding a layer of charm and depth to your décor.

To get started on your upcycling journey, all you need is a bit of imagination and a willingness to experiment. Scour thrift stores, garage sales, and online marketplaces for hidden gems just waiting for a makeover. Gather your tools, whether it’s a paintbrush, a sewing kit, or a power drill, and dive into the world of DIY transformation.

For inspiration, turn to social media platforms like Instagram and Pinterest, where a vast community of upcyclers share their creative projects and step-by-step tutorials. You’ll soon discover that the possibilities are endless, and you’ll develop an eye for spotting the potential in even the most unlikely of items. So, are you ready to embrace the upcycling trend and bring some magical transformations into your home?

DIY Home Security: 10 Affordable Ways to Protect Your Property

Protecting your home is a top priority, but it doesn’t have to come with a hefty price tag. There are numerous affordable ways to enhance your home security and deter potential intruders. Here are ten cost-effective DIY methods to safeguard your property and provide peace of mind.

1. Reinforce Doors and Windows

The first line of defense for your home is your doors and windows. Ensure all entry points are sturdy and secure. Install deadbolts on exterior doors and reinforce door frames with strike plates. Use window locks and consider adding security film to make the glass more resistant to breaking. These simple measures can significantly increase your home’s security.

2. Install Motion Sensor Lights

Outdoor lighting is an excellent deterrent for burglars. Motion sensor lights can startle intruders and draw attention to your property. Place these lights near entry points, such as doors and windows, and in dark areas around your home. Solar-powered options are available, which can save on electricity costs and provide continuous security.

3. Use Smart Locks

Smart locks offer convenience and enhanced security. These locks can be controlled remotely via your smartphone, allowing you to lock and unlock doors without needing a physical key. Some smart locks also come with features like temporary access codes for guests, alert notifications, and integration with other smart home devices.

4. Set Up a DIY Alarm System

A DIY alarm system can be a cost-effective alternative to professional monitoring services. Many DIY systems come with easy-to-install sensors for doors and windows, motion detectors, and a central control panel. These systems can send alerts to your smartphone, allowing you to monitor your home from anywhere. Some even offer optional professional monitoring for an added layer of security.

5. Secure Your Wi-Fi Network

Your home Wi-Fi network can be a gateway for cybercriminals to access your personal information and smart home devices. Secure your network by using a strong, unique password and enabling WPA3 encryption. Additionally, consider setting up a guest network for visitors and regularly updating your router’s firmware to protect against vulnerabilities.

6. Use Surveillance Cameras

Surveillance cameras are an effective way to monitor your property and deter potential intruders. Many affordable options are available, including wireless cameras that can be installed indoors and outdoors. Look for cameras with motion detection, night vision, and remote viewing capabilities. Place them at entry points and other vulnerable areas around your home.

7. Display Security Signs and Stickers

Sometimes, the mere presence of security signs and stickers can deter burglars. Even if you don’t have a full security system, placing signs and stickers from well-known security companies around your property can create the illusion that your home is protected. This simple and inexpensive tactic can make intruders think twice before targeting your home.

8. Trim Landscaping

Overgrown bushes and trees can provide cover for burglars attempting to break into your home. Regularly trim your landscaping to eliminate potential hiding spots and improve visibility around your property. Keep shrubs and hedges below window height and consider planting thorny bushes under windows to deter intruders.

9. Install a Peephole or Doorbell Camera

Knowing who is at your door before opening it can enhance your security. Install a peephole on your front door or opt for a doorbell camera that allows you to see and communicate with visitors remotely. Many doorbell cameras come with motion detection and video recording features, adding an extra layer of security to your home.

10. Join or Start a Neighborhood Watch Program

Community involvement can be a powerful tool in preventing crime. Join an existing neighborhood watch program or start one in your area. Working together with your neighbors to monitor suspicious activity and share information can create a safer environment for everyone. Regular meetings and communication can help build a strong network of vigilant community members.

Implementing these ten affordable DIY home security measures can significantly enhance the safety of your property without breaking the bank. By reinforcing doors and windows, installing motion sensor lights, using smart locks, setting up a DIY alarm system, securing your Wi-Fi network, using surveillance cameras, displaying security signs, trimming landscaping, installing a peephole or doorbell camera, and participating in a neighborhood watch program, you can create a robust security system that deters intruders and provides peace of mind. Prioritize these steps to protect your home and ensure the safety of your loved ones.